Webflow might seem limiting when you realize every blog post in a collection shares the same template. But here's the thing: you don't have to show the same content to every reader.
Built into Webflow is a powerful system called conditional visibility that lets you hide and show elements based on your CMS data. And these aren't just elements you want to hide from view—these are elements you can use to target readers with information that's more valuable to them.
In this post, I'll show you how to set up dynamic sidebar ads that change based on the blog post someone is reading. The result? More relevant CTAs, higher click-through rates, and more qualified leads from your content.
The Problem: One Template, One CTA
On my blog, I have a sidebar with a general CTA encouraging people to work with me. It's fine. It works.
But what if someone lands on an SEO-focused post? Wouldn't it be better to show them an ad that says "Is your site ready to rank?" instead of a generic "Book a strategy call" message?
With conditional visibility, you can do exactly that—without building multiple templates.
How It Works: The Big Picture
Here's the setup at a high level:
- Create a reference collection for your ads (I called mine "Blog Ads")
- Add a reference field to your blog posts that links to that collection
- Build two ad blocks on your template: a default and a targeted version
- Use conditional visibility to show the right one based on whether an ad is selected
Let's break each step down.
Step 1: Create Your Blog Ads Collection
First, you need a place to store your different ads. In the CMS, create a new collection called Blog Ads (or whatever makes sense for you).
Inside this collection, add the fields you need for your ad. Mine includes:
- Name – So I can identify it in the dropdown
- Link – Where the ad should point
- Background Image – The visual for the ad
- Button Text – The CTA button copy
- Subtext – Any supporting copy
- CTA Text Off (Switch) – A toggle to hide the heading if needed
- Subtext Off (Switch) – A toggle to hide the subtext if needed
The toggles give you flexibility to customize each ad without creating entirely new designs.
Step 2: Add a Reference Field to Your Blog Posts
Now go to your Blog Posts collection and add a new field. Choose Reference and link it to your Blog Ads collection.
This creates a dropdown on each blog post where you can select which ad (if any) should appear on that post.
Step 3: Build Your Sidebar Ad Blocks
On your blog post template, create your sidebar ad the way you want it to look. Then duplicate it.
- Block 1: Your default ad (shows when no specific ad is selected)
- Block 2: Your targeted ad (pulls content from the Blog Ads reference)
For the targeted ad, bind the content (image, text, link, etc.) to the Blog Ads reference field so it dynamically pulls in the right content.
Step 4: Set Up Conditional Visibility
This is where the magic happens.
For the Default Ad:
- Select the default ad block
- Go to Settings → Conditional Visibility
- Click the + button
- Select your Blog Ads reference field
- Set the condition: Element is visible when Blog Ads is not set
- Save
Now the default ad only appears when you haven't selected a specific ad for that post.
For the Targeted Ad:
- Select the targeted ad block
- Go to Settings → Conditional Visibility
- Click the + button
- Select your Blog Ads reference field
- Set the condition: Element is visible when Blog Ads is set
- Save
Now the targeted ad only appears when you've chosen a specific ad for that post.
Bonus: Toggle Individual Elements Within an Ad
Want even more control? You can use switches (toggles) inside your Blog Ads collection to hide or show specific parts of the ad.
For example, I have a CTA Text Off switch. Here's how to wire it up:
- Select the element you want to toggle (like the heading text)
- Go to Settings → Conditional Visibility
- Click the + button
- Navigate into your Blog Ads reference and select the switch field
- Set the condition: Element is visible when CTA Text Off is off
- Save
Now, when the switch is off, the element shows. When you flip it on, the element hides. This lets you customize each ad's appearance without duplicating your entire ad structure.
Why This Matters for Your Business
Conditional visibility turns one blog template into a flexible, targeted marketing machine.
- Writing an SEO post? Show an SEO-focused CTA.
- Writing a general tips post? Fall back to your default "Book a call" ad.
- Want to A/B test different messages? Swap ads without touching your template.
The result: more relevant CTAs → higher click-through rates → more leads from the content you're already creating.
Wrapping Up
Webflow's single-template-per-collection setup isn't a limitation—it's an opportunity. With conditional visibility and a well-structured CMS, you can deliver personalized experiences to your readers without the overhead of managing multiple templates.
Give it a try on your next project. And if you found this helpful, let me know what other Webflow topics you'd like me to cover.
Want help setting this up on your site? Book a strategy call and let's talk.
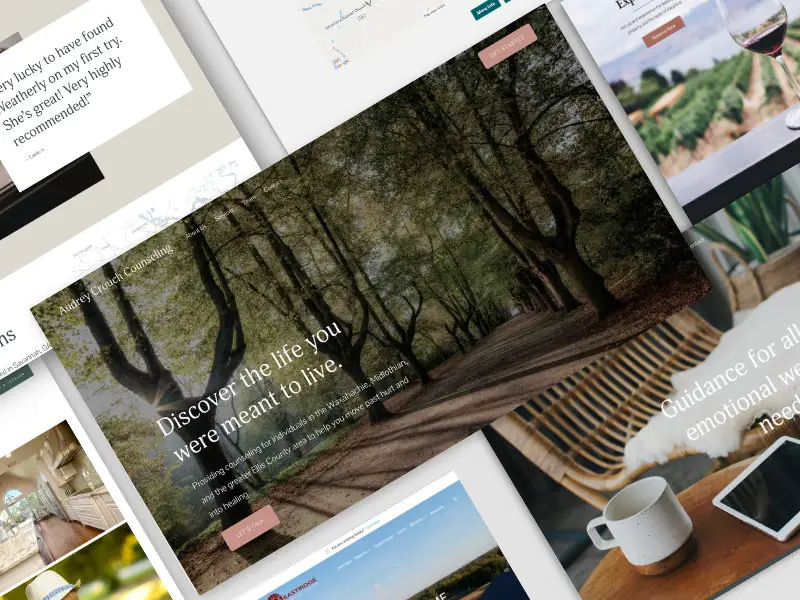
End to End Webflow Design and Development Services
From Web Design and SEO Optimization to Photography and Brand Strategy, we offer a range of services to cover all your digital marketing needs.
Webflow Web Design
We design custom Webflow websites that are unique, SEO optimized, and designed to convert.
Webflow Support
Get dedicated design and development support from a Webflow Professional Partner without the overhead of a full-time hire or the hassle of one-off project quotes.


Claim Your Design Spot Today
We dedicate our full attention and expertise to a select few projects each month, ensuring personalized service and results.