If you've ever been mystified by the idea of creating popups that have multiple close points. For instance, open and close with the same button. Close by clicking on the screen or another close element. If you haven't figured out how to make these interactions smooth so that it opens on the first click every time without diving into code, you're not alone. We've all been there.
But what if I told you that with Webflow, you could achieve this directly using its native interactions panel? Sounds exciting, right?
Today, I share with you an in-depth tutorial that's going to change the way you approach popups in Webflow.
Multi-point Close Popup
In this video, we'll dive deep into Webflow's interactions panel to craft a multi-point close popup – a popup you can close multiple ways and still have it open when you click the trigger.
And the best part? It’s all without a single line of code.
The Break Down
I've broken down the process step-by-step. We'll look at the:
- HTML
- CSS
- nteractions
No matter your expertise level. Whether you're a Webflow newbie looking to learn new tricks or a seasoned designer on the hunt for advanced techniques, this guide has got you covered.
By the end of this tutorial, you'll be armed with the knowledge and confidence to design complex popups, navigations, or menu's that can elevate your website's user experience.
Belief and Questions
I believe that when we unlock the full potential of the tools at our disposal, our creativity truly flourishes. So, dive in, experiment, and discover the magic of Webflow's interactions.
And as always, if you have any questions or insights to share, drop them in the comments below.
Let's keep the learning going!
Happy designing, and I can't wait to see the incredible popups you come up with!
Transcript
Here is a cleaned up version of the transcript if you would rather read through it.
Introduction
Casey here with CEO creative, where I'm teaching you web design and webflow one video at a time. Today, we're going to look at how to build a complex pop-up inside of webflow. Last time we looked at how to build a simple pop-up, just one pop-up that pops up over your entire screen. But today, we're going to look at how you can build a more complex pop-up structure.
Pop-up Functionality
Think about pop-ups on multiple items inside of a collection list or just inside of a grid. Or think about a custom navigation or a custom menu that you have built. That's what we're going to look at today—how to build that and how to make that open and close without giving you any sort of trouble. We're not going to use any sort of JavaScript or anything like that. We're simply going to use the animation panel inside of webflow. So, let's jump into the computer and check that out.
[Music]
On-Screen Demonstration
All right, well, here we are inside of the computer. I'm going to show you the HTML and the CSS you need, as well as the interactions. We're going to focus a lot on what makes the magic of this happen.
Setting up the HTML and CSS
We start with our benefits component, essentially a grid with two benefit items inside. This isn't driven through a CMS, purposefully, to showcase both the right and wrong way to set this up. We have our benefit item, benefit image wrapper, and inside of that, the modal. This setup ensures the button remains accessible, whether the modal is open or closed. Positioning and display settings are crucial for the proper functioning of the modal.
Interactions and User Experience
The interactions are key. Multiple buttons, showing and hiding at the right times, ensure seamless user experience. Using "selected element" ensures the right pop-up opens, and the interactions work as they should.
One pitfall is using a first-click animation to open and a second-click animation to close, especially if multiple methods of closing are desired. This creates a disconnect in the user experience. Instead, using two distinct buttons—one to open, one to close—provides a smoother experience.
Closing Thoughts
This approach is ideal for custom menus or navigations. By switching buttons and ensuring smooth transitions, the user experience is optimized. The key takeaway: always aim for simplicity and intuition when designing interactive elements.
If you found value in this, smash that like button for me. If you want more content like this, subscribe to the channel. If this has been helpful for you, leave a comment down below and maybe even link to a project you've done to showcase your learnings. Hope to see you in the next video.
End to End Webflow Design and Development Services
From Web Design and SEO Optimization to Photography and Brand Strategy, we offer a range of services to cover all your digital marketing needs.
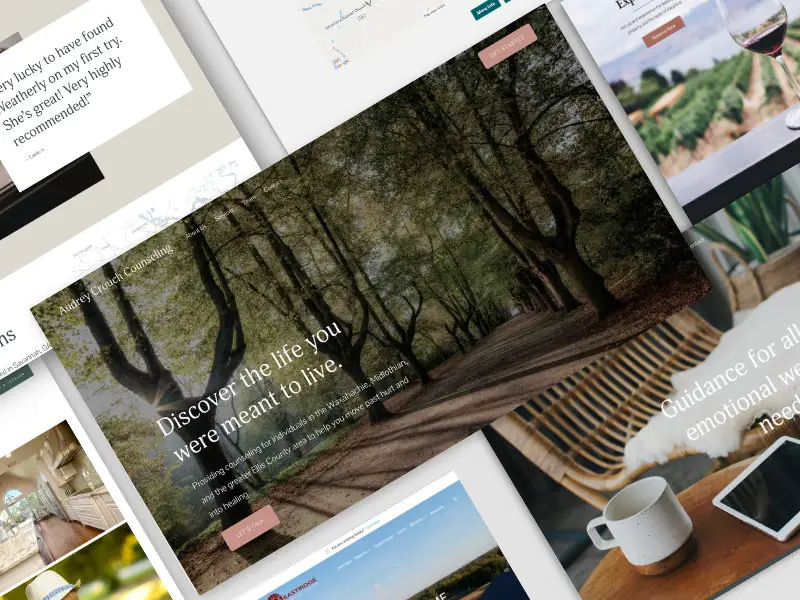
Webflow Web Design
We design custom Webflow websites that are unique, SEO optimized, and designed to convert.
Webflow Support
Get dedicated design and development support from a Webflow Professional Partner without the overhead of a full-time hire or the hassle of one-off project quotes.


Claim Your Design Spot Today
We dedicate our full attention and expertise to a select few projects each month, ensuring personalized service and results.